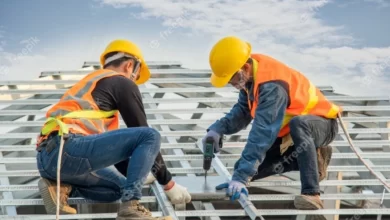
Eavestrough Installation and Replacement: A Homeowner’s Guide

Your home’s eavestroughs may not always be top of mind, but they play a critical role in protecting your property from water damage. Efficient eavestrough installation and replacement are crucial for channeling rainwater away from your home’s foundation and exterior. When neglected, faulty eavestroughs can lead to serious and costly repairs.
This blog will walk you through the signs that it’s time to replace your eavestroughs, the installation process, maintenance tips, and the importance of professional services. By the end, you’ll understand why keeping your eavestroughs in top shape is essential for your home.
Why Eavestroughs Are Important
Eavestroughs, also known as gutters, are responsible for directing rainwater away from your home. Without a functional eavestrough system, water can collect around your home’s foundation, weakening it and leading to cracks or flooding. Worse yet, water can seep into your siding, causing mold, mildew, and damage to your home’s structure.
A properly installed and well-maintained eavestrough protects your home from these risks while preserving its curb appeal. Neglecting eavestrough installation and replacement when needed can create issues that are far more expensive to fix than simply taking proper care of your system.
Signs It’s Time for Eavestrough Replacement
How do you know when it’s time for a replacement? Here are some warning signs to watch out for before it’s too late:
1. Leaks and Cracks
Leaks and visible cracks are clear indications that your eavestroughs are no longer functioning properly. Even small cracks allow water to escape, potentially causing damage to your home’s exterior or landscaping.
2. Rust and Corrosion
Rust is a sign that your eavestroughs have seen their better days. Corroded sections weaken the system, leading to failure and potential water damage.
3. Sagging or Pulling Away
If your eavestroughs are sagging or pulling away from the roofline, they might be overloaded with debris or simply too worn to stay in place. This is a sign that immediate action is needed.
4. Overflow During Rain
Water spilling over the edges during a downpour is a sign your eavestroughs aren’t doing their job. Clogged or misshapen troughs often cause this issue.
5. Visible Damage
Broken fasteners, holes, or bends in the eavestrough system are signs it’s time for a professional assessment.
The Eavestrough Installation Process
Once you’ve identified the need for new eavestroughs, here’s an overview of what the installation and replacement process looks like.
Step 1: Assessment
A thorough inspection of your home is the first step. Professionals will measure dimensions, analyze problem areas, and recommend the best eavestrough solution for your specific needs.
Step 2: Material Selection
Next, you’ll choose the material for your eavestroughs. Popular options include aluminum (lightweight and rust-resistant), steel (durable and strong), and vinyl (cost-effective but less durable). Your choice depends on your budget, aesthetic preferences, and climate.
Step 3: Removal of Old Eavestroughs
Damaged or outdated eavestroughs will be carefully removed to prepare for the new system. This step is critical to ensure the new installation is stable and free of obstructions.
Step 4: Installation
Professionals will cut and install eavestroughs tailored to your home. They ensure proper alignment and slope to facilitate smooth water flow, securing each section tightly to the roofline for long-lasting functionality.
Step 5: Testing
Finally, the system is tested to ensure everything is working as intended. Any adjustments will be made at this stage to guarantee efficiency.
Tips for Maintaining Your Eavestrough System
Consistent maintenance extends the life of your eavestroughs and prevents premature replacement. Follow these tips to keep your system running smoothly year-round.
1. Clean Regularly
Remove leaves, dirt, and debris from your eavestroughs at least twice a year. Cleaning prevents clogs that can lead to overflows and damage.
2. Inspect for Damage
Look for leaks, rust, or displaced sections regularly. Address small issues quickly to avoid major repairs or replacement costs.
3. Install Leaf Guards
Leaf guards prevent debris from accumulating in your eavestroughs, reducing the frequency of cleanings and minimizing the risk of clogs.
4. Ensure Proper Downspout Flow
Check that your downspouts are directing water away from your foundation. You may need to add extensions for better water dispersal.
5. Hire a Professional Inspector Annually
An annual inspection by an expert is a worthwhile investment to spot potential issues and maintain the overall system integrity.
Why Use Professional Eavestrough Installation and Replacement Services?
While DIY methods may be tempting, professional installation and replacement services offer peace of mind and superior results. Professionals ensure the alignment, slope, and sturdiness of the system, which are critical for efficiency and longevity.
Additionally, experts have access to high-quality materials and tools, as well as the experience to handle unique challenges your home might present. They can also advise on the best choices for your specific needs, saving you time and money in the long run.
Well-Maintained Eavestroughs Protect What Matters
Your home is one of your most valuable investments, and its protection should not be overlooked. Regular maintenance and timely eavestrough installation and replacement are essential to prevent water damage, maintain curb appeal, and preserve property value.
Instead of waiting for problems to worsen, take action now. Hire professionals to assess, install, or replace your eavestrough system for reliable performance and peace of mind.
Looking to take the first step? Contact our team to book an inspection or get a free quote for your eavestrough installation and replacement needs today!


